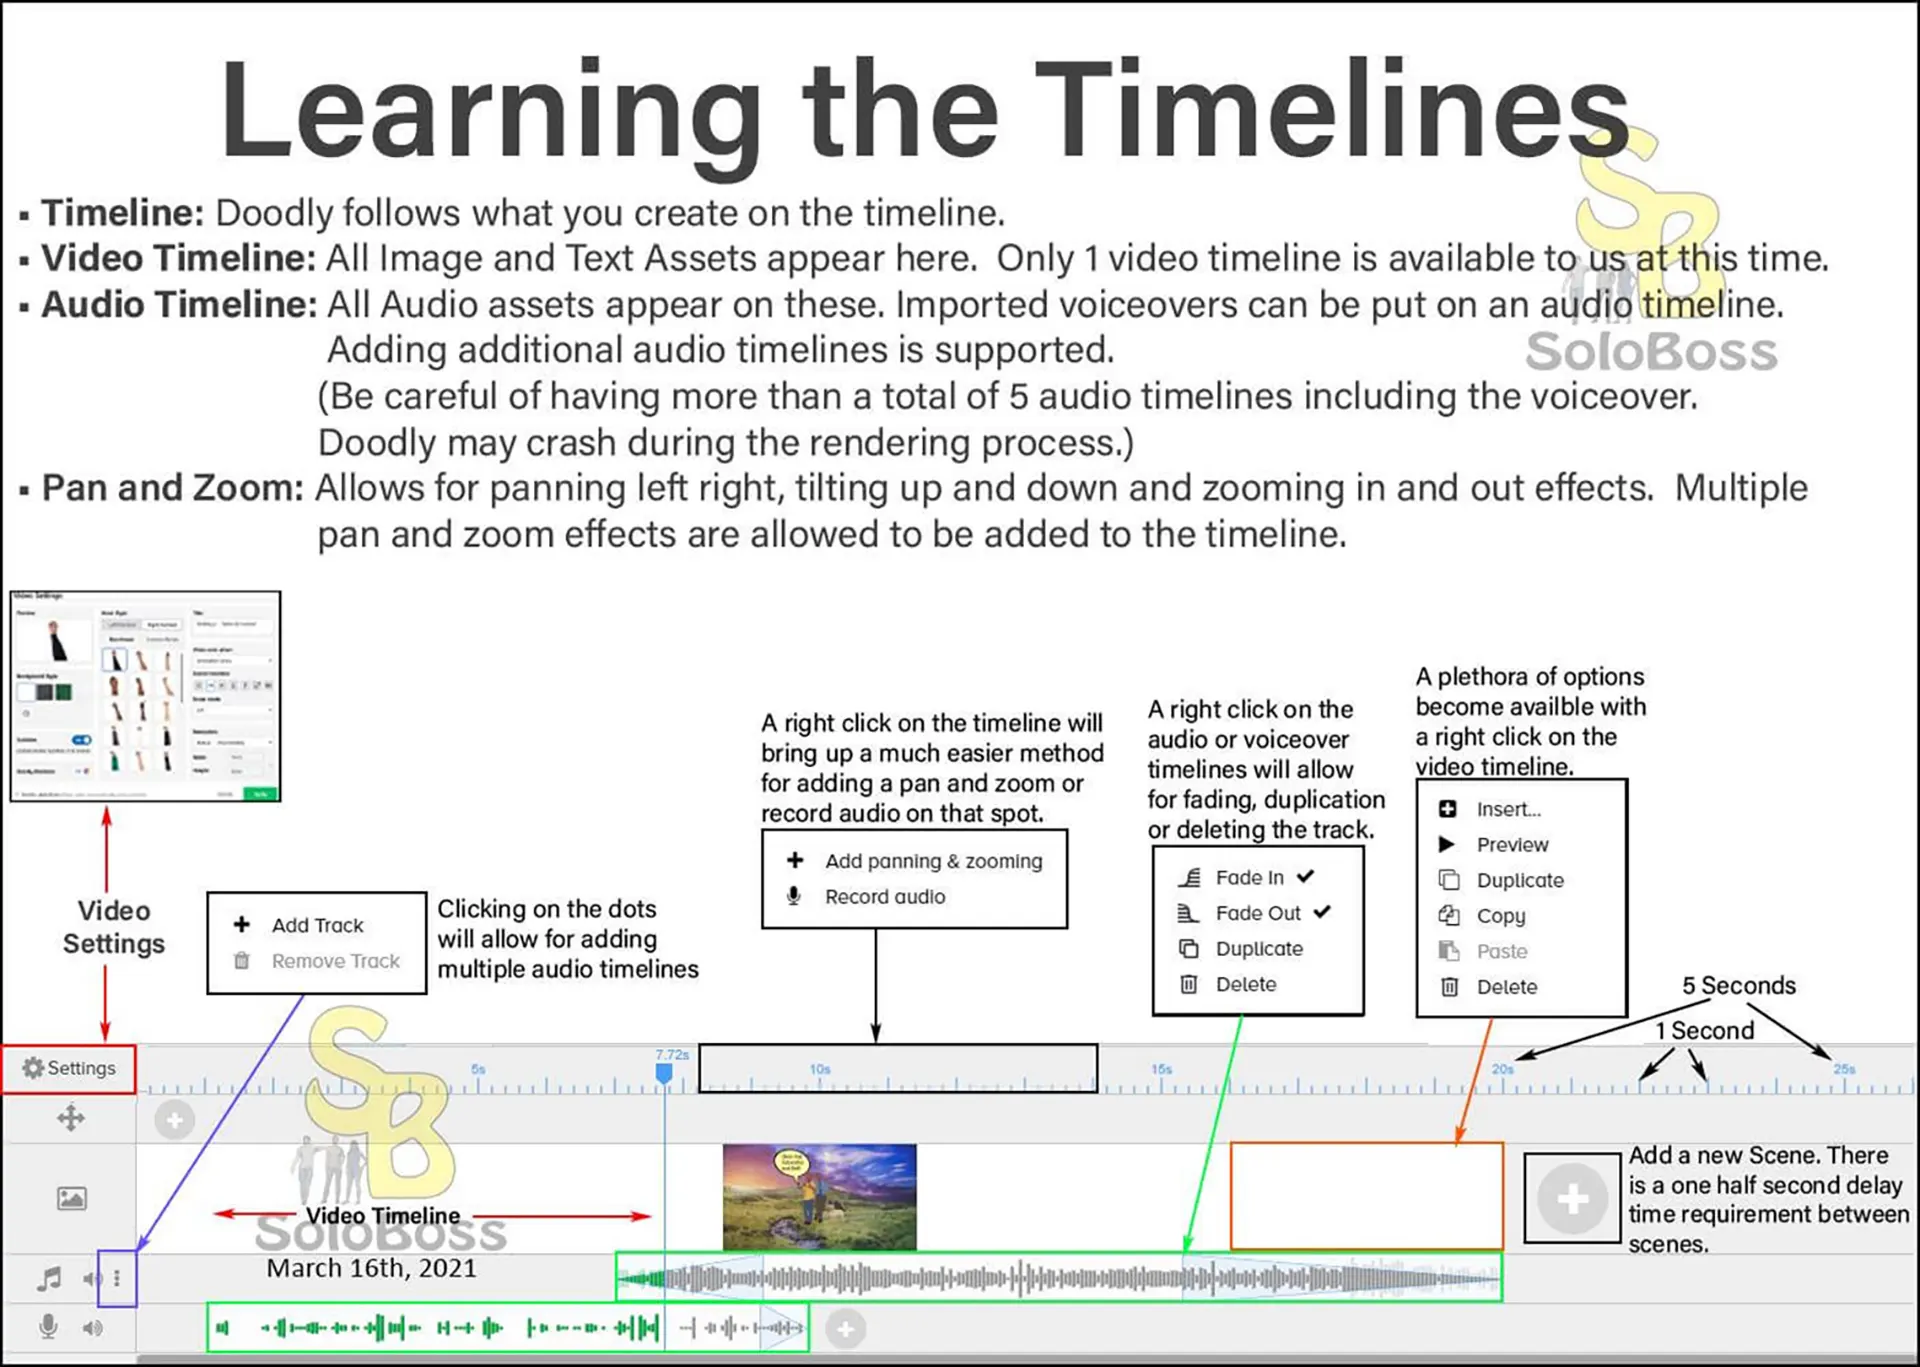
Learning the Timelines
Everything in Doodly is timelines and layers. Learning how to make the best use of Doodly means learning the timelines and the options available to us.
Video Timeline
There is only 1 video timeline allowed in Doodly. Everything to do with props, characters, imported images and text appear in this timeline.
Audio Timeline
All imported .mp3 files, Doodly provided audio files sound effects are all associated with the audio timeline.
We have the option of adding additional audio timelines. Doodly has some major bugs in it when it comes to audio. Too many audio timelines and Doodly may crash during rendering. Too many audio files on the same timeline and Doodly will crash during rendering.
If you are going to use audio in Doodly there are some best practices to follow:
1. Don’t attach a sound effect to an asset. This binds the sound effect to the duration of the asset so if your asset has less duration than our sound effect the sound effect will be cut off. If your asset has 0 duration, the sound effect will never play. Additionally, there is no method of adjusting the audio when binding a sound effect to an asset so that sound effect will play at 100% all the time essentially making attaching the sound effect to an asset useless. Instead, create a separate timeline for your sound effects.
2. Stagger the music and use fading techniques to make it appear as one continuous audio stream throughout the doodle. Watch my Working with Audio video tutorial if you are not sure what I mean.
- Doodly Beginner Video Tutorial: Working with Audio
3. Adjust the audio levels to a respectable level which vary depending on the music file. There are different adjustments for when a voiceover is included and without a voiceover. I provide suggested levels in my Working with Audio video tutorial. These are basic guidelines from what I’ve learned and not set in stone but they are a great place to begin.
- Doodly Beginner Video Tutorial: Working with Audio
Pan and Zoom
Pan and Zoom can be a little confusing at first. We have to think backwards and think about how effects are going to happen. I have a video tutorial out that will teach you all about the very basics of pan and zoom to make that learning curve much easier.
- Doodly Beginner Video Tutorial: Pan and Zoom
Settings
More appropriately termed as Video Settings allows the control of the default settings within Doodly.
Time Bar
Displays the length of time in 1 second and 5 second intervals.
Voiceover
Allows for recording a voiceover in Doodly. It is highly suggested to use an audio editing software like Adobe Audition or Audacity and record your audio with an external microphone, edit the audio and then import it into Doodly. You can hear the difference between using a script, external microphone and proper editing software to edit and enhance the audio and no script, a laptop microphone with minimal editing and no audio enhancements in the following video. The first half which is channel promotion is edited properly and uses a script. The second half is with a laptop microphone without a script.
- Doodly Beginner Video Tutorial: Increasing The Number of Layers


